Description - Voice VLAN allows you to easily prioritize IP voice traffic through the switch
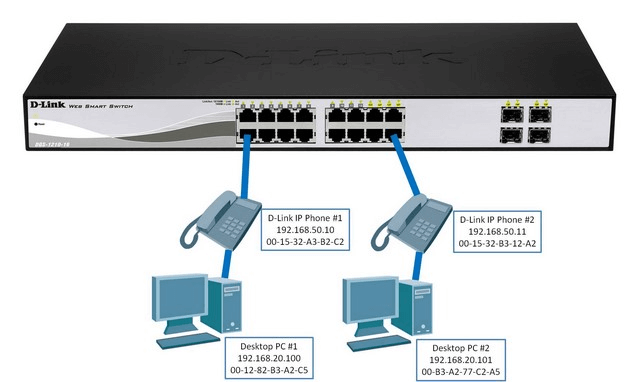
Example – In our example we have created two VLANs:
- Data VLAN - VID 20
- Voice VLAN - VID 50
Ports 2 and 16 are added to the data VLAN (because we have phones connected to these ports)
Every phone has been configured with the VLAN 50 (voice VLAN)
 Step 1
 - Enter the web configuration interface DGS-1210
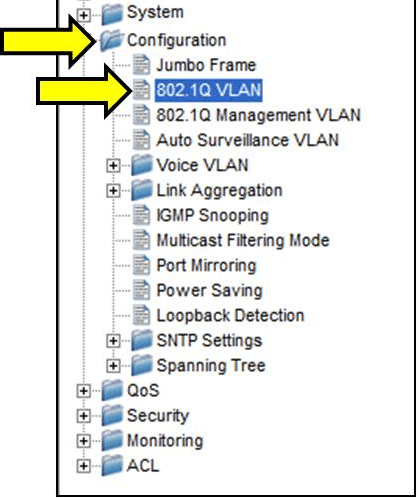
Step 2 - Please go to Configuration > 802.1Q VLAN
 Step 3
 - Click on
VLAN 1
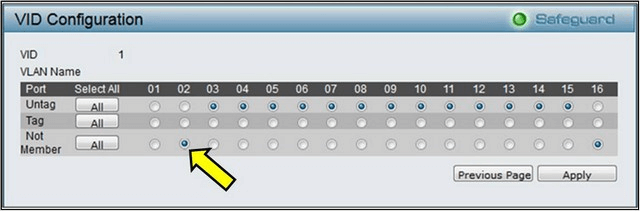
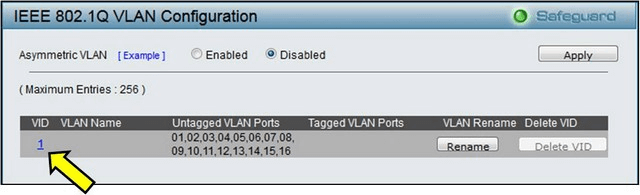 Step 4
 - Set as
“Not Member” on all ports where phones are connected (in this example ports 2 and 16, then click
“Apply”
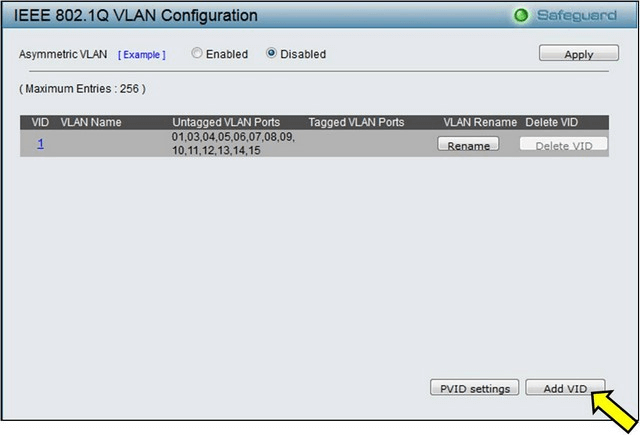
 Step 5
 - Click
“Add VID”
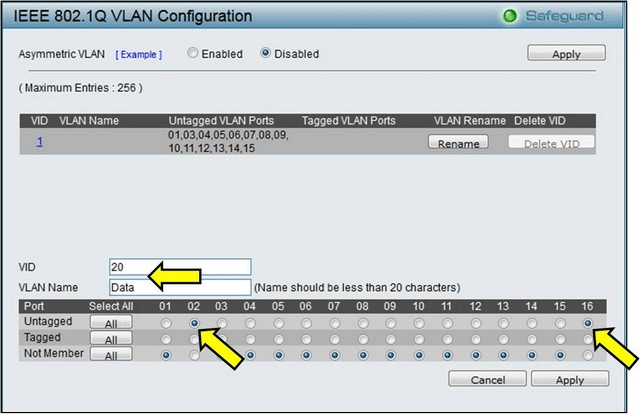
 Step 6
 - Create the “Data” VLAN, adding ports as “Untagged” where phones are connected (ports 2 and 16), then click
“Apply”.
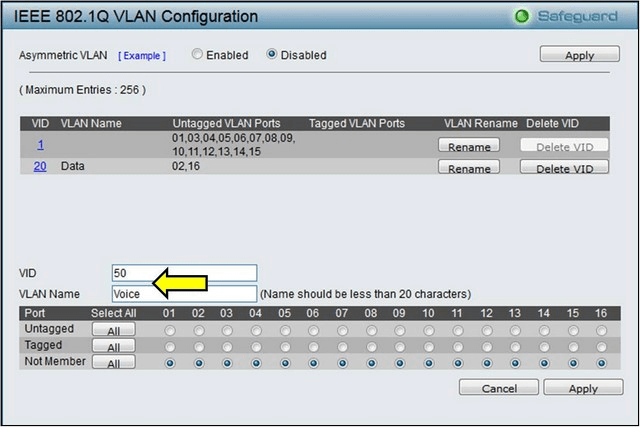
Step 7 - Create Voice VLAN (leaving all ports as Not Member), then click
“Apply”
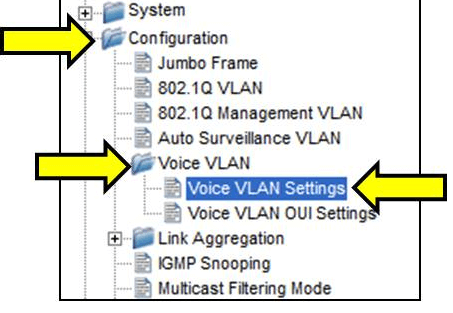
Step 8 - Please go to
Configuration > Voice VLAN > Voice VLAN Settings
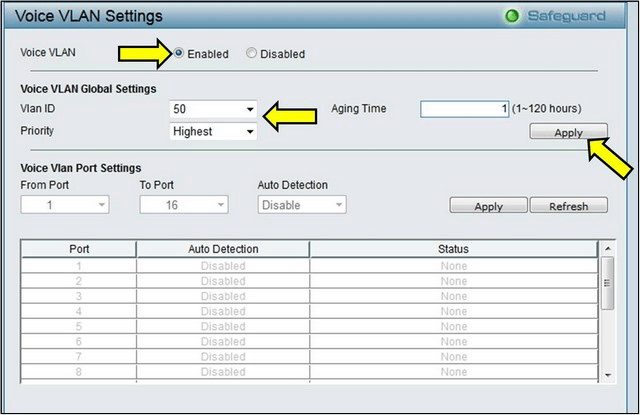
Step 9 - Set the Voice VLAN with the following parameters
• Voice VLAN: Enable
• VLAN ID: Enter the ID of the VLAN previously created voice (in this example VID 50)
• Priority: Specify the priority
Then click
“Apply”
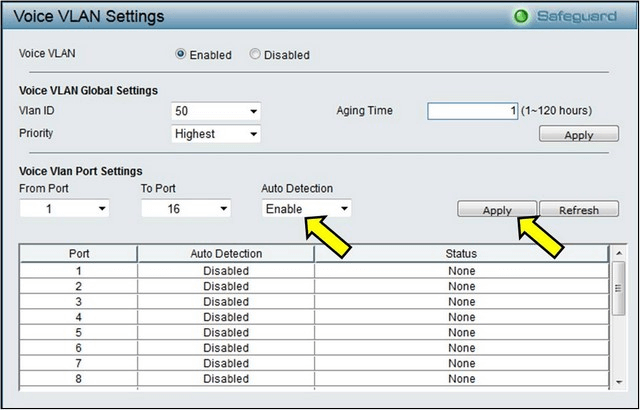
 Step 10
 - In Voice VLAN Port Settings, change Auto Detection to
“Enabled”, and then click
“Apply”.
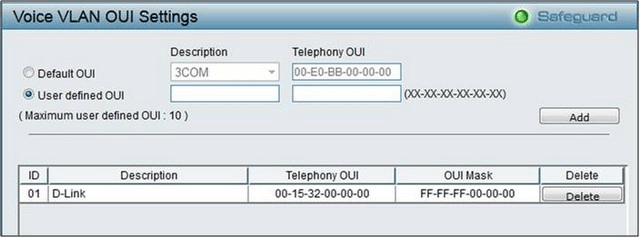
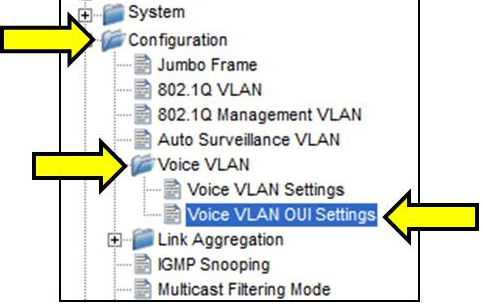
Step 11 - Please go to
Configuration > Voice VLAN > Voice VLAN OUI Settings
Step 12 - Is this section, specify the type of device to be connected to the switch, so the switch will know which traffic to prioritize
Note: If you select a predefined mark, be sure what is in
“Telephony OUI” match your phone.
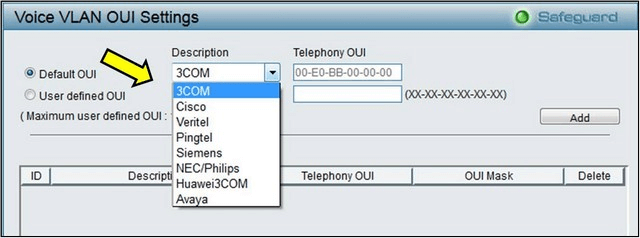
If your brand is not on the list, select
“User defined OUI”, then enter a description and OUI
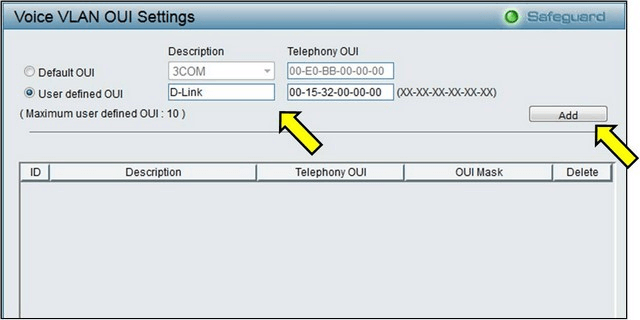 Step 13
 - Once configured, the phone will be displayed in the list